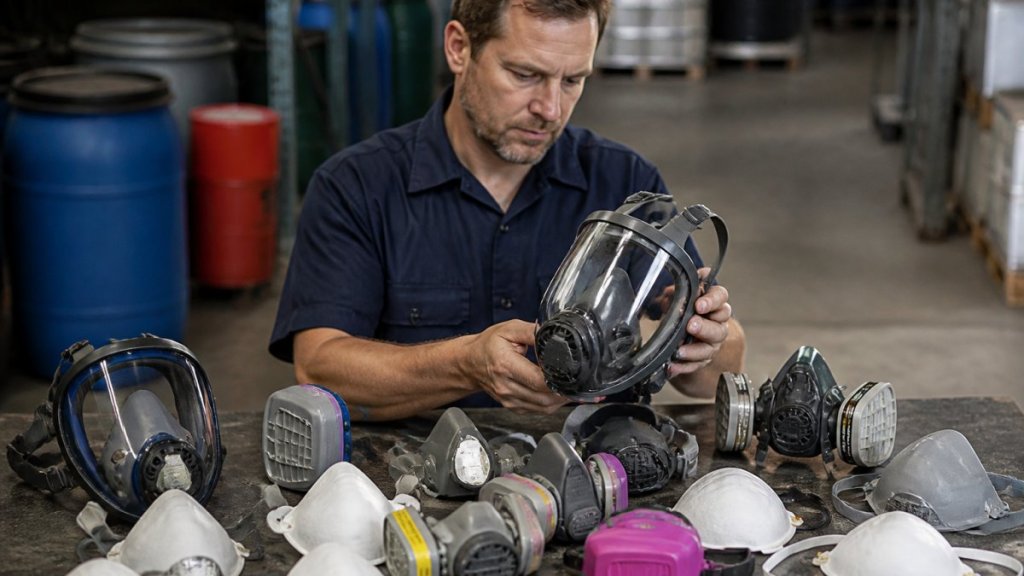
Last Updated: November 2, 2026
Quick Summary
Respirator selection based on exposure data means dividing the measured concentration by the exposure limit to get the required protection factor, then choosing a respirator class whose assigned protection factor exceeds that number. You must also confirm the atmosphere is not immediately dangerous to life or health, oxygen is adequate, and the filter or cartridge suits the contaminant.
- Personal sampling in the breathing zone supports respirator selection; area sampling alone does not.
- Required protection factor equals measured concentration divided by the exposure limit.
- A measured 120 ppm against a 50 ppm limit gives a required protection factor of 2.4.
- Calculate a separate required factor for every contaminant and limit type, then use the highest.
- When data are missing, select conservatively and document a written plan to measure.
Table of Contents
- Why Exposure Data Drives Every Respirator Selection Decision
- Conducting a Workplace Exposure Assessment Before You Choose a Respirator
- Comparing Measured Exposure to Occupational Exposure Limits
- Calculating the Required Protection Factor for Your Respirator Selection
- How the Respirator Assigned Protection Factor Limits Your Options
- Air-Purifying vs. Atmosphere-Supplying: Choosing the Right Respirator Type
- Respirator Cartridge Selection and Filter Choices for the Contaminant
- What to Do When Exposure Data Are Missing, Outdated, or Variable
- Frequently Asked Questions
Why Exposure Data Drives Every Respirator Selection Decision
Respirator selection based on exposure data is the practice of matching a respirator to what a worker actually breathes, using measured concentrations rather than guesswork.
The difference matters because a respirator is a control of last resort. It sits at the bottom of the hierarchy of controls, behind elimination, substitution, and engineering controls (the CDC).
Below, we walk through the full sequence: assess, measure, compare to limits, calculate the protection factor, then pick the type and filter. Each step depends on the one before it.
Conducting a Workplace Exposure Assessment Before You Choose a Respirator
A workplace exposure assessment is the structured process of identifying what hazards are present, who is exposed, and how much. A step-by-step chemical exposure assessment methodology gives you the full process this section only introduces. It comes before any respirator decision, not after.
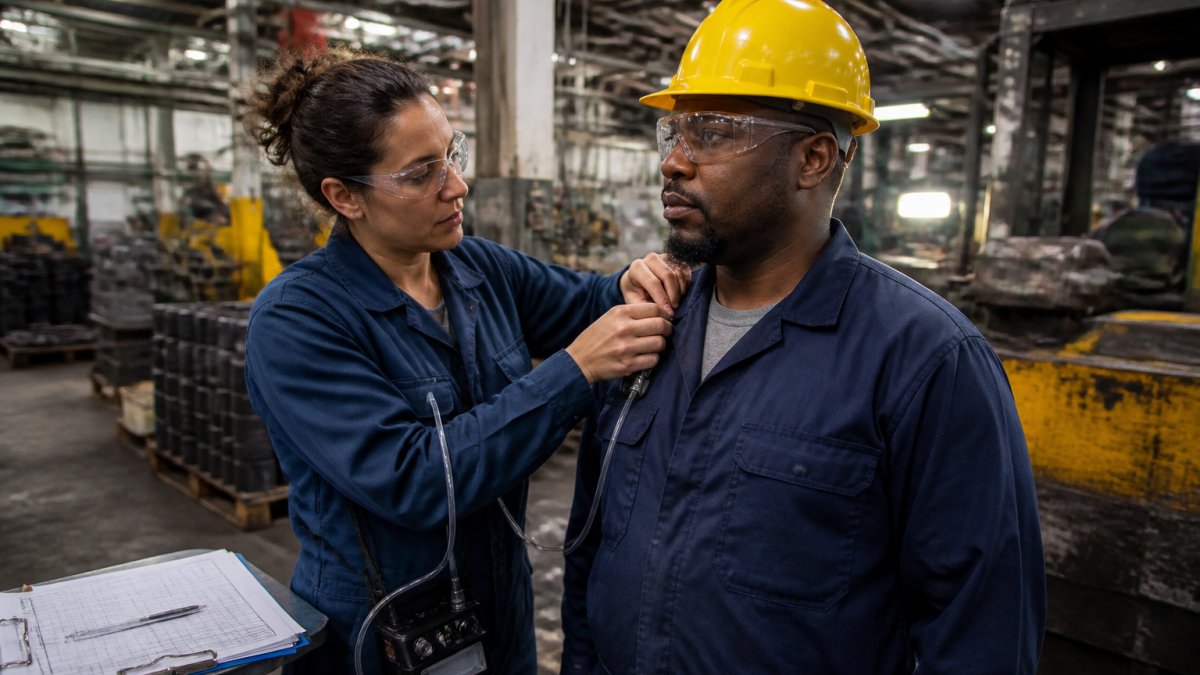
Start with a walk-through of the operation. List every chemical, dust, fume, mist, gas, and vapor in use or generated. Then note who works near it and for how long.
Identifying the Contaminant and Its Physical Form
Physical form decides the filter. A particulate needs a filter; a gas or vapor needs a cartridge or canister.
- Dust, fume, mist: solid or liquid particles, captured by a particulate filter
- Gas and vapor: molecules, captured by chemical media
- Combinations: welding fume plus shielding gas, for example, needs both
Getting this wrong is a common mistake. A guide to common workplace chemical exposure risks helps you recognize which contaminants and forms you may be dealing with. A particulate filter will not stop solvent vapor, no matter how well it fits.
Using Air Monitoring for Respirator Selection
Personal sampling is the backbone of the assessment. Readers who need exposure data collected first can review industrial hygiene air quality testing procedures.
Area sampling alone will not support respirator selection. It tells you about the room, not the worker.
Results come back as a report with concentrations and limits. Interpreting industrial hygiene monitoring reports explains how to read them before using the data to select a respirator.
Comparing Measured Exposure to Occupational Exposure Limits
Occupational exposure limits are the benchmarks every measured concentration is judged against. The comparison tells you whether protection is needed and how much.
The main limits you will work with:
- Permissible exposure limit (PEL): the OSHA limit, enforceable
- Recommended exposure limit (REL): NIOSH guidance, often stricter (the CDC)
- Time-weighted average (TWA): average over a full shift
- Short-term exposure limit (STEL): average over 15 minutes
- Ceiling limit: never to be exceeded at any moment
Compare your measured concentration to the most protective applicable limit. A measured exposure above the PEL requires controls. A measurement near the STEL or ceiling needs attention even if the full-shift average looks acceptable.
Document the comparison. An inspector will want to see the measured value, the limit used, and the basis for choosing it.
Calculating the Required Protection Factor for Your Respirator Selection
The required protection factor is the measured exposure divided by the exposure limit. The result tells you the minimum protection the respirator must provide, and it is the number that connects a lab report to a device on a shelf.
Required protection factor = measured concentration ÷ exposure limit
A Worked Example With Assumptions Stated
Suppose a personal sample from the breathing zone shows a solvent at 120 ppm as an 8-hour time-weighted average, and the applicable limit is 50 ppm as an 8-hour TWA.
- Measured concentration: 120 ppm (8-hour TWA, personal sample)
- Exposure limit: 50 ppm (8-hour TWA)
- Required protection factor: 120 ÷ 50 = 2.4
A required factor of 2.4 means any respirator class with an assigned protection factor above 2.4 can be considered, provided the atmosphere is not immediately dangerous to life or health, oxygen is adequate, and the cartridge or filter is appropriate for the contaminant. In practice, a respirator class with an assigned protection factor above 2.4 must be selected from the applicable class table.
State your assumptions when you document this. The example assumes a full-shift sample, a single contaminant, a limit expressed as an 8-hour TWA, and no short-term or ceiling concern. Change any of those and the number changes with it.
Short-Term and Ceiling Limits Change the Math
A full-shift average can look acceptable while a 15-minute peak blows past a short-term exposure limit. When a substance has a STEL, calculate a separate required protection factor using the peak concentration and the STEL. When it has a ceiling limit, the peak must never exceed the ceiling at any moment, and a respirator selection based only on the TWA is not defensible.
Run the calculation for every contaminant, every task, and every limit type. Then take the highest required factor as your floor.
Mixtures and Multiple Contaminants
When more than one contaminant is present, calculate the required protection factor for each component against its own limit, then select for the highest. Do not average across contaminants, and do not assume a cartridge that handles one chemical handles the others.
Watch out: rounding down here is a real error. Always round up to the next class of respirator. A factor of 2.4 rules out anything rated at 2, and a factor of 12 rules out a half-mask rated at 10.
How the Respirator Assigned Protection Factor Limits Your Options
The respirator assigned protection factor is the level of protection a properly fitted and functioning respirator class is expected to provide. It caps the maximum use concentration.
Under OSHA’s respiratory protection standard, the written program, not the respirator alone, is the requirement. That program covers the administrator, medical evaluation, fit testing, and the limits on qualitative testing.
| Respirator Class | Assigned Protection Factor |
|---|---|
| Half-mask air-purifying | 10 |
| Full-facepiece air-purifying | 50 |
| Loose-fitting powered air-purifying | 25 |
| Tight-fitting powered air-purifying, half mask | 50 |
| Supplied-air, continuous flow, hood or helmet | 25 |
| Supplied-air, pressure-demand, full facepiece | 1,000 |
Maximum use concentration = assigned protection factor × exposure limit. If that ceiling falls below your measured exposure, that class is out.
Air-Purifying vs. Atmosphere-Supplying: Choosing the Right Respirator Type
Air-purifying respirators filter the surrounding air. Atmosphere-supplying respirators deliver clean air from a separate source.
Choose air-purifying only when three conditions hold:
- The contaminant has a filter or cartridge that captures it
- The atmosphere is not immediately dangerous to life or health
- Oxygen is at a safe level
Atmosphere-supplying is required for oxygen-deficient atmospheres, for immediately dangerous to life or health conditions, and for contaminants with poor warning properties or no adequate filter. Securing a reliable supply of breathable air remains the most fundamental step toward improving respiratory health in any environment where airborne hazards persist.
In practice, most routine manufacturing exposures fit air-purifying devices. Confined spaces and tank entry usually do not.
Respirator Cartridge Selection and Filter Choices for the Contaminant
Respirator cartridge selection follows the contaminant, not the other way around. Match the media to the chemical, and confirm compatibility before you buy.
- Particulate filters: N, R, or P series for dust, fume, and mist; N is not oil-resistant
- Chemical cartridges: color-coded by class, matched to the gas or vapor
- Combination cartridges: particulate plus chemical, for mixed exposures
- Canisters: larger media for higher concentrations or longer durations
Set a change schedule. Cartridges load up and breakthrough without warning, and a schedule based on use conditions is the only reliable guide. Fit testing and medical evaluation apply to every tight-fitting device.
What to Do When Exposure Data Are Missing, Outdated, or Variable
Missing data does not excuse the decision. It changes how you make it. This is the part of respirator selection most programs handle badly, and it is where a defensible record is won or lost.
When Data Are Missing
Treat the exposure as unknown and select conservatively. That means a higher protection class than the hazard alone would suggest, plus a written plan to measure. Document the reasoning: the hazard identified, the absence of data, the conservative class chosen, and the sampling scheduled. An inspector who sees a conservative interim choice backed by a sampling plan is looking at a program; an inspector who sees a guess is looking at a citation.
When Data Are Outdated
Old numbers are only valid for the process they were collected under. Check whether the chemical, the quantity used, the task duration, the ventilation, or the enclosure changed. If any did, the old numbers no longer apply and the selection must be revisited. A common pattern is a sampling report from years ago that predates a new process line, the report looks authoritative and is quietly wrong.
When Exposures Are Variable
A single sample is a snapshot, not a distribution. Exposures vary by task, by shift, by worker technique, and by season.
A result reported as below the detection limit is not zero. It means the method could not see the contaminant at that level, and the true exposure may be higher. Treat it as an upper bound and select accordingly.
Data Quality and Uncertainty
Ask how the sample was collected, how long it ran, what method was used, and whether it was personal or area. Area samples do not support respirator selection because they describe the room, not the worker’s breathing zone. A result with no stated method, duration, or limit is not usable data, it is a number.
Ongoing Verification After Selection
Selection is not the end of the process. Connect it to follow-up monitoring, cartridge change schedules, fit-test results, and medical evaluation. Set explicit triggers for reassessment: a new chemical, a process change, a ventilation failure, a change in production rate, or a fit-test failure. When any trigger fires, return to the exposure data and re-run the calculation. That loop, measure, select, verify, reassess, is what keeps a respirator program defensible as the workplace changes.
Frequently Asked Questions
How do you select a respirator based on exposure data?
Start with a workplace exposure assessment that identifies the contaminant and its physical form, then collect personal air sampling data during representative tasks. Compare the measured concentration to the applicable occupational exposure limit, such as an OSHA permissible exposure limit or NIOSH recommended exposure limit. Divide the measured concentration by the limit to get the required protection factor. Choose a respirator whose assigned protection factor meets or exceeds that number, and confirm the contaminant is not immediately dangerous to life or health.
What exposure information is needed to choose a respirator?
You need the contaminant identity and its physical form (particulate, gas, vapor, or a mixture), the measured concentration from personal sampling, the sampling duration and whether it represents a time-weighted average, short-term exposure limit, or ceiling limit, and the applicable occupational exposure limit. Also note any mixture effects, oxygen levels, and whether the area is immediately dangerous to life or health. Without that information, respirator selection becomes guesswork.
How do you calculate the required respirator protection factor?
Divide the measured exposure concentration by the occupational exposure limit. For example, if a solvent measures 150 ppm and the permissible exposure limit is 50 ppm, the required protection factor is 3. You then select a respirator with an assigned protection factor of at least 3, such as a half-mask air-purifying respirator with an APF of 10, provided the maximum use concentration is not exceeded. Always use the most protective limit that applies to the exposure scenario.
When is air monitoring needed for respirator selection?
Air monitoring is needed whenever workers may be exposed to airborne contaminants above an occupational exposure limit, when processes or materials change, when symptoms or complaints suggest overexposure, or when prior data are outdated. Personal sampling that reflects actual tasks and durations gives the most reliable basis for respirator selection. If monitoring shows exposures below the limit, respirators may still be required for other reasons, but the data should guide the decision rather than assumption.


Leave a Reply