Table of Contents
- Why SWPPP Site Monitoring Decides Whether Your Permit Survives an Audit
- What Inspectors Actually Look For in Your Records
- Practice 1: Build a SWPPP Inspection Checklist That Matches Your Site-Specific Plan
- Practice 2: Set SWPPP Inspection Frequency Around Rainfall, Not Just the Calendar
- Practice 3: Sample at Representative Monitoring Locations and Discharge Points
- Practice 4: Use a Stormwater Inspection Report Template That Holds Up in Court
- Practice 5: Close the Loop With a SWPPP Corrective Action Log
- Common SWPPP Site Monitoring Mistakes and How to Avoid Them
- Conclusion
- Frequently Asked Questions
Last Updated: October 12, 2026
Why SWPPP Site Monitoring Decides Whether Your Permit Survives an Audit
The stakes are simple. A stormwater permit is a legal document. Inspectors and regulators judge your compliance by what you can show them.
So the plan itself is only half the job. The other half is the trail you leave behind.
Below, we’ll walk through the five practices that hold up when someone asks for proof. We’ll also cover the mistakes that sink otherwise solid sites.
What Inspectors Actually Look For in Your Records
Inspectors look for three things: a site-specific plan, inspection records that match it, and proof you fixed problems. They are not grading your intentions.
A common mistake is treating the SWPPP as a filing cabinet document. In practice, it should drive every inspection you run.
Here is what gets reviewed:
- Whether your plan matches current site conditions
- Whether inspections happened on the required schedule
- Whether findings led to corrective actions
If any of those gaps exist, the audit conversation shifts from “what happened” to “why isn’t this documented.”
Practice 1: Build a SWPPP Inspection Checklist That Matches Your Site-Specific Plan
A SWPPP inspection checklist should mirror your own plan’s BMPs, discharge points, and drainage areas. A generic checklist is the fastest way to miss a control that only exists on your site.
Start by pulling the exact control list from your plan. Then build the checklist around it.
A Practical Numbered Monitoring Checklist
- Confirm current weather and forecast before leaving the trailer
- Walk every discharge point and note whether it is flowing
- Inspect each BMP against its plan location
- Check for sediment buildup at silt fence and inlet barriers
- Look for rill and gully erosion in exposed areas
- Note any off-site tracking or sediment leaving the site
- Photograph every finding with a date stamp
- Record the inspection in your log before end of day
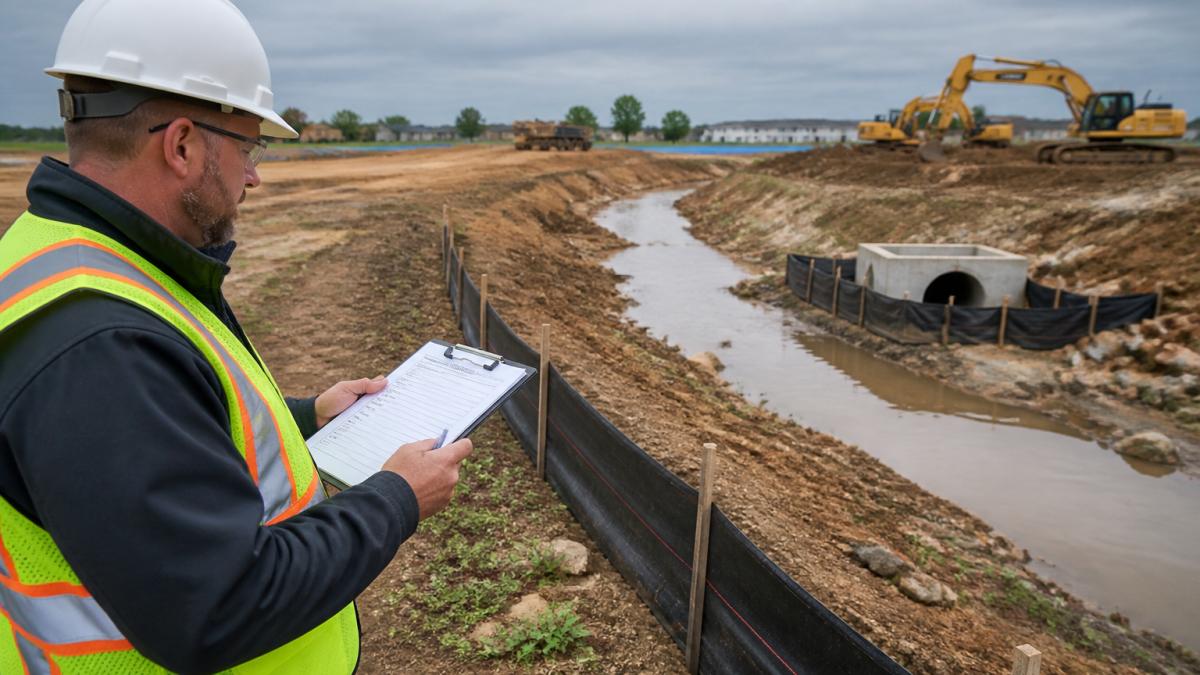
Number your checklist items to match the BMP numbers in your plan. When an inspector asks about item 14, you can point to the same number in both documents.
Practice 2: Set SWPPP Inspection Frequency Around Rainfall, Not Just the Calendar
SWPPP inspection frequency is driven by your permit and your plan, not by a habit of checking on Fridays. Many permits require inspections on a set interval plus additional checks after qualifying rain events.
That second trigger is where most sites fall short. A calendar-only schedule misses the inspections that matter most.
Weather-Triggered Monitoring and Event Response
Track rainfall on site, not from a phone app three towns over. Use a site gauge and log the readings.
After a qualifying event, inspect within the timeframe your permit specifies. Check discharge points first, since that is where problems show up.
Then document the event itself: start time, end time, and total rainfall. That single record answers most questions about whether your post-storm inspection was timely.
If you cannot show the rainfall total for a storm event, you cannot show your inspection was triggered correctly. Missing that link is one of the most common findings in a permit review.
Practice 3: Sample at Representative Monitoring Locations and Discharge Points
Sampling only works if the sample represents what actually leaves the site. A grab taken from a still corner of a sediment basin tells you almost nothing about the discharge leaving your property. Most top-ranking guides stop at “sample at discharge points”, the operational detail below is where a site-specific plan separates itself.
Choosing Monitoring Locations
Work from the drainage map in your SWPPP, not from convenience. A representative monitoring plan typically includes:
- Each permitted discharge point, the outfall where stormwater leaves the site and enters a ditch, creek, or municipal system.
- Upstream reference points, a location above your disturbance where runoff enters, so you can compare what you received against what you released.
- Downstream points, below the discharge, to show whether your controls are protecting the receiving water.
Label every location in the plan, on the site map, and physically on the ground with a stake or marker. If a new outfall is added mid-project, update the plan and the labels the same week. Inspectors compare the plan to what they see; mismatches read as a plan that no longer reflects the site.
Sampling Technique That Holds Up
A few habits make the difference between a defensible sample and a discarded one:
- Sample where flow is mixed, not in a dead zone or against a bank.
- Use clean, dedicated containers per location and per parameter.
- Rinse the container with the sample water when the method allows.
If your permit does not require lab analysis, a calibrated field meter for turbidity and pH still gives you a trend line you can act on.
Metrics, Thresholds, and Response Triggers
Track the metrics your permit names, and set your own response triggers below them. A trigger is a number that tells you to act, not just observe.
| Metric | What It Signals | Response Trigger |
|---|---|---|
| Turbidity | Sediment in discharge | Rising trend across events |
| Visible sediment | BMP failure | Any visible plume |
| Flow at discharge point | Active runoff | Flow outside storm events |
| Sediment depth at BMP | Maintenance need | Approaching design limit |
| pH | Materials or concrete contact | Reading outside the range your permit cites |
When a trigger fires, log it. Then log what you did about it.
Quality Assurance and Equipment Calibration
Monitoring data is only as good as the instrument that produced it. Build a short QA routine into every sampling day:
- Calibrate before use. Follow the manufacturer’s schedule, typically daily for pH and per the meter’s spec for turbidity.
- Record the calibration. Log the standard used, the reading, and the date. A calibration record with no date is not a record.
- Run a field check. A duplicate sample or a second reading at the same spot catches drift before it corrupts a trend.
Assign one person to own calibration and maintenance. When the same hands touch the meter every week, drift gets caught early and the log stays consistent.
Weather-Triggered Sampling
Many permits require sampling during or shortly after a qualifying storm event, not just on a calendar. Track rainfall with an on-site gauge, log start and end times, and sample within the window your permit specifies. If you cannot show the rainfall total, you cannot show the sample was triggered correctly, and that gap is one of the most common findings in a permit review.
Practice 4: Use a Stormwater Inspection Report Template That Holds Up in Court
A stormwater inspection report template should capture who, what, when, where, and what happened next. If it can’t answer those five questions, it won’t help you. Most guides stop there. The gap on the SERP is the workflow, how a completed form becomes an audit-ready record that survives a regulator’s review months later.
Keep the template short enough that crews actually fill it out. A one-page form that gets completed beats a five-page form that doesn’t.
What the Template Must Capture
Your template should include:
- Inspector name and qualifications
- Date, time, and weather conditions
- Each location inspected, tied to the plan’s location IDs
Digital Field Records and Audit-Ready Documentation
Paper forms get lost, smudged, or back-dated. A digital workflow closes those gaps and produces a record that reads the same way to you and to an inspector:
- Timestamped photos. Every photo carries the date, time, and location automatically. A photo with no timestamp is a photo, not evidence.
- Geolocation. GPS tags tie each photo and entry to the exact discharge point or BMP, so a reviewer can match the record to the plan.
- Inspection logs. Entries are saved in sequence, not reconstructed later. The order of events is preserved.
A common pattern is to run the field form on a tablet or phone and sync to a shared folder at the end of each inspection day. The record is complete before the crew leaves the site, not the following week.
Making the Record Findable
An audit-ready record is one you can produce in minutes, not hours. Name files with the date and location ID, keep one folder per inspection, and store records where the person answering a regulator’s request can reach them without calling the field crew.
If your records live in three places, a truck, a trailer, and someone’s email, you do not have a record system. You have a search problem waiting for an audit.
The EPA’s stormwater program guidance outlines the federal framework that state and local permits build on. Your own permit adds the specifics, including how long records must be retained and in what form.
Practice 5: Close the Loop With a SWPPP Corrective Action Log
A SWPPP corrective action log turns a finding into a fixed problem. Without it, an inspection just creates a list of things nobody addressed.
Log every finding the same day. Assign one owner and one deadline per item.
Then verify the fix and close the entry with a date and a photo. An open item with no owner is the first thing an inspector will ask about.
The inspection is not the compliance event. The corrective action is. A site with ten findings and ten documented fixes is in better shape than a site with zero findings and no records.
Common SWPPP Site Monitoring Mistakes and How to Avoid Them
The same mistakes show up across sites, and most come down to documentation rather than effort.
- Using a generic checklist instead of a site-specific one
- Inspecting on a calendar only, ignoring rain triggers
- Sampling at convenient spots instead of representative ones
Each of these is fixable in a week. The fix is a habit, not a purchase.
Conclusion
Stormwater compliance rewards sites that document what they did, not sites that did the most. The five practices here, a site-specific checklist, rain-triggered frequency, representative sampling, a solid report template, and a closed-loop corrective action log, all serve one goal: proof.
If your records would not survive a close look today, that is worth fixing before someone else looks. Michael Karl McNeil brings twenty-five years of fire service experience, a Master of Science in Environmental Health, and Qualified SWPPP Developer registration with the State Water Resources Control Board to stormwater, environmental, and safety work across California and the Western states.
Contact Michael Karl McNeil to get your monitoring records audit-ready.
Frequently Asked Questions
What should a SWPPP site inspection include?
A complete inspection covers your site-specific plan’s BMPs, including silt fence, inlet barriers, check dams, and stabilization on erosion-prone areas. Walk every discharge point and drainage path, note sediment buildup or damage, and record the condition of each control. Document the date, inspector name, rainfall since the last visit, and any corrective actions needed. The inspection record should be detailed enough that someone who was not on site can understand exactly what was found and what was done about it.
How often should a SWPPP site be inspected?
SWPPP inspection frequency depends on your permit and your state’s requirements. Many permits require inspections at least once every seven days and within 24 hours after a storm event that produces measurable runoff, though some jurisdictions allow reduced schedules once stabilization is complete. Always check your specific permit conditions, because federal, state, and local requirements can differ. The safest approach is to inspect on a fixed calendar and again after every qualifying rainfall event.
What should be documented during a stormwater inspection?
Document the inspection date and time, the inspector’s name and qualifications, current weather and rainfall totals since the last inspection, and the condition of every BMP on site. Note any turbidity or visible sediment in discharge, the location of any problem, and the corrective action taken or scheduled. Photographs and a signed stormwater inspection report template make your records audit-ready and defensible if a regulator or attorney reviews them later.
How do you track corrective actions in a SWPPP?
Use a SWPPP corrective action log that lists each deficiency, the date it was found, the person responsible, the fix applied, and the date it was verified complete. Number each entry so you can cross-reference it to the original inspection report. Review the log at every inspection to confirm nothing is still open. A log that shows problems found and resolved within days demonstrates good faith and is far stronger evidence than a log full of unresolved items.


Leave a Reply