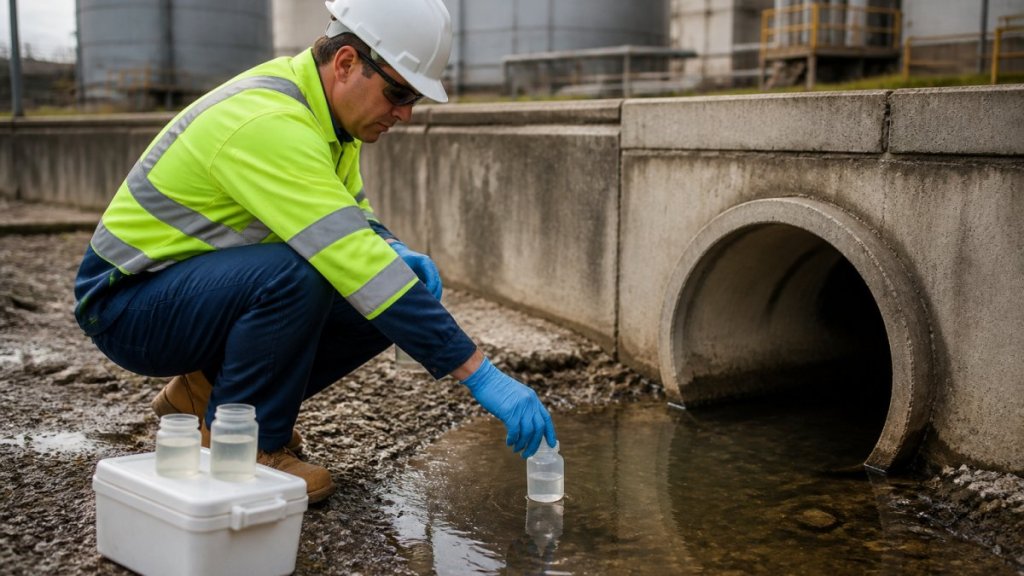
Table of Contents
- Before the Storm: Qualifying Events and Sampling Triggers
- Choosing the Outfall and Sampling Location
- Stormwater Sampling Equipment: Preparation and Calibration
- The Stormwater Grab Sampling Procedure, Step by Step
- Stormwater Sample Preservation and Handling
- Your Stormwater Sample Collection Checklist and Field Notes
- After the Sample: Shipping, Lab Results, and Exceedances
- Frequently Asked Questions
Last Updated: October 17, 2026
Before the Storm: Qualifying Events and Sampling Triggers
Industrial stormwater sampling is the field practice of collecting discharge water during a qualifying rain event and submitting it to a lab for analysis, and industrial stormwater sampling starts long before the first drop falls. At Michael Karl McNeil, we treat the forecast as the trigger for preparation, not the storm itself. Get the trigger wrong and no collection technique will save your reporting year.
What Makes a Storm Event Qualifying
A qualifying storm event is a precipitation event that produces a discharge from a permitted outfall and meets the thresholds in your specific permit. Those thresholds vary: some permits measure the dry period before the storm, others rainfall depth or discharge flow. Read your permit language first, then your Stormwater Pollution Prevention Plan (SWPPP), which should restate the trigger in plain terms.
A few practical rules apply almost everywhere:
- Track the antecedent dry period. Many permits use a 72-hour dry period before the event counts.
- Confirm the storm will actually produce stormwater discharge at the outfall. A light drizzle on dry ground may never reach the pipe.
- Log the event even if you decide it doesn’t qualify. Your reasoning is part of the record.
The most common mistake is assuming every rainstorm is a sampling event. Collecting outside a qualifying event wastes lab money and creates data you may have to explain. Worse, it can mask a missed required event if your log doesn’t separate the two.
Reading the Forecast and the 72-Hour Dry Period
Check the forecast daily during your sampling season. When rain is likely, look back at the prior 72 hours for measurable precipitation at your site or the nearest official gauge, and document the gauge and readings you used.
Then plan logistics: who is on call, where the equipment sits, and how fast someone can reach the outfall. A storm that starts at 2 a.m. still needs a grab sample in a cooler within minutes, not hours.
Choosing the Outfall and Sampling Location
The right sampling location is the one your permit names, usually the point where stormwater leaves your site through a stormwater discharge point. But the permit rarely tells you how to find every outfall or prove the spot represents the whole discharge, that work is on you, and it is where most sampling programs quietly fall apart.
Map the Drainage Areas Before You Map the Outfalls
Start with a site plan and a walkover, not the pipe. Trace where rain landing on each part of your site actually goes. Roof downspouts, paved lots, loading docks, storage pads, and unpaved ground all shed water differently, and one outfall can collect from several distinct drainage areas.
A practical sequence:
- Pull the site plan and the SWPPP figure that shows drainage boundaries and outfalls. If the figure is stale, redraw it.
- Walk the perimeter in dry weather and mark every place water leaves the site, pipes, ditches, swales, curb cuts, sheet-flow exits, and any unpermitted or forgotten discharge.
- Trace each drainage area back from its outfall to the high point, noting what surfaces and activities drain into it.
- Reconcile your list against the permit. Every permitted outfall should have a mapped drainage area; every drainage area should have a named outfall.
This map is what lets you defend a representative sample. When a regulator asks why you sampled Outfall 002 and not the ditch on the north fence line, the map is your answer.
Selecting a Representative Sampling Point
At each outfall, pick a point with these qualities:
- Representative sample potential: the water there reflects the whole discharge, not a puddle, a splash zone, or a dead-end pool.
- Downstream of the last mixing point and upstream of any surface contamination, debris, or standing water.
- Safe, stable footing away from traffic, moving equipment, and electrical hazards.
Keep the point identical event to event. A representative sampling design is mostly discipline: same point, same method, same documentation, every event. Moving it between storms introduces variability you cannot explain later.
When Flow Is Intermittent or the Outfall Is Inaccessible
Not every outfall cooperates. Common situations:
- Intermittent flow. Sample only when discharge is actually occurring and the event qualifies. If the outfall runs dry mid-event, document the time flow stopped rather than sampling a dry pipe.
- Inaccessible outfall. If the permitted point cannot be safely reached, your permit may allow an alternate location that is still representative of the discharge. Confirm that allowance in writing before you rely on it, and document why the primary point was unreachable.
- Submerged or backwater outfalls. If the outfall discharges below the receiving water line, sample as close to the discharge as the permit allows and note the condition. Do not sample receiving water and call it stormwater.
An outfall you cannot find, cannot reach, or forgot to map is a reporting problem waiting to happen. Walk every permitted outfall before your first event so you know the access route in the dark and the rain, and so you know which ones will need an alternate plan.
Stormwater Sampling Equipment: Preparation and Calibration
Stormwater sampling equipment should be staged in a sealed kit and inspected before every event, not the morning of. Build the kit once and restock it after each use.
Your kit should include:
- Clean sample containers supplied by the lab, with the correct preservative already added
- A sampling pole with a bottle holder
- Nitrile gloves, safety glasses, and a rain shell
Equipment inspection means checking bottles for cracks and caps for fit. Equipment calibration applies to any field meter, such as a pH or conductivity pen: follow the manufacturer’s instructions, record the calibration in your log, and never use an out-of-calibration meter’s readings for compliance.
Pre-label your bottles at the office with the site, outfall, date line, and parameter. Writing labels in the rain with cold hands is how samples get misidentified, and a misidentified sample is worthless to the lab.
The Stormwater Grab Sampling Procedure, Step by Step
A grab sample is a single aliquot of water collected at one point in time, and the stormwater grab sampling procedure is short enough to memorize. Follow it in order.
- Confirm the event qualifies. Check the dry period and the discharge.
- Put on fresh gloves. Change them if you touch anything questionable.
- Uncap the bottle and hold it near the base, away from the mouth.
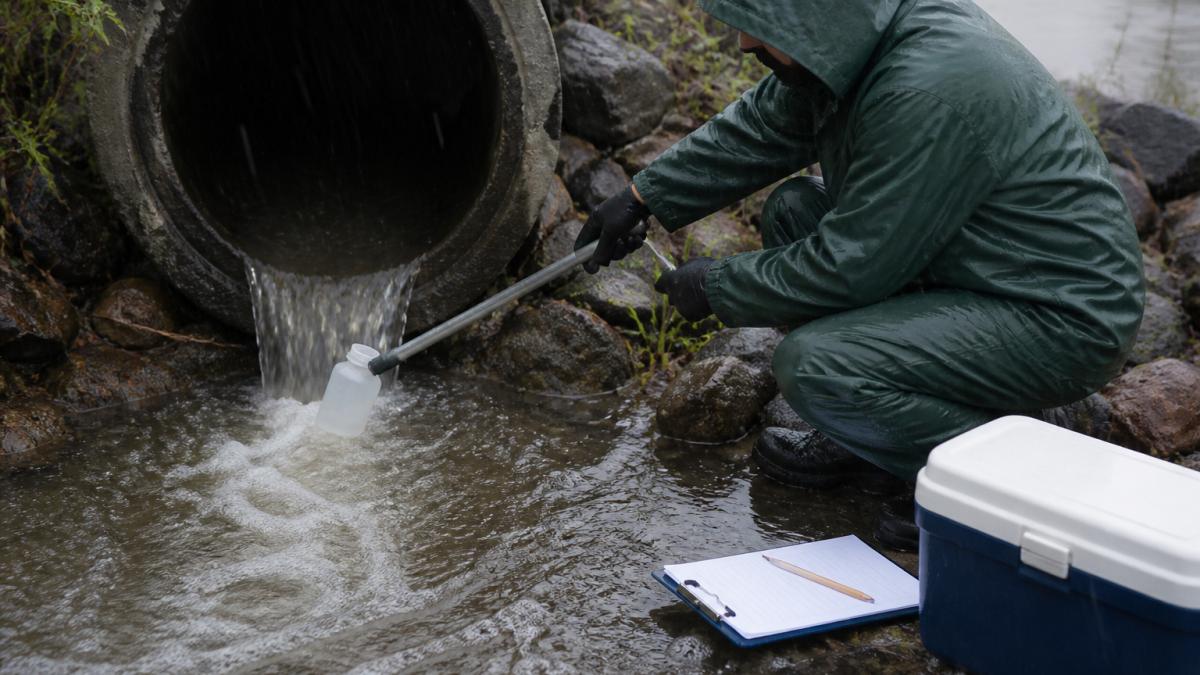
- Reach the sampling point with the pole. Submerge the bottle mouth below the surface.
- Fill the bottle without overfilling if preservative is present. Leave the headspace the lab specifies.
- Cap tightly and invert gently to mix if the lab instructs it.
- Label the bottle with site, outfall, date, time, and your initials.
- Place it on ice immediately in the cooler.
- Record the time, flow conditions, and weather in the field log.
Collecting Sheet Flow and Hard-to-Reach Discharges
Sheet flow is stormwater running as a thin film across the ground rather than through a pipe, and it needs a different approach. Don’t scoop from the leading edge, where sediment concentrates.
For hard-to-reach discharges, use a pole extension or an intermediate clean container only if your permit and lab allow it. Never sample from a puddle that has pooled and stopped moving.
Stormwater Sample Preservation and Handling
Stormwater sample preservation and handling decides whether the lab can trust the result. Preservation starts at collection and never stops until the sample is logged in at the lab.
Core rules:
- Keep samples cooled on ice or in a cooler with ice packs. Don’t let bottles sit in the sun or in a hot truck cab.
- Sample temperature matters. Many labs want samples held cold, not frozen, so pack ice around the bottles rather than burying them in a deep freeze.
- Use the sample container and preservative the lab supplied. Never swap bottles between parameters.
Cooling and chain of custody are the two preservation steps most often done badly. Get both right and the lab can defend your data. Get either wrong and you may need verification sampling to replace the result.
Your Stormwater Sample Collection Checklist and Field Notes
Use this stormwater sample collection checklist at every event. Print it, clip it to the cooler, and initial each line.
- Qualifying event confirmed and dry period checked
- Forecast and gauge readings logged
- Outfall and sampling location confirmed against permit
Field notes should read like a witness statement: arrival and sampling times, weather, flow at the outfall, anything unusual, and who was with you. If you skipped a parameter or location, write down why. Those notes are your defense if a result is questioned later.
After the Sample: Shipping, Lab Results, and Exceedances
Get the cooler to the lab within the holding time your lab specifies. Ship with the chain of custody inside, keep a copy for your file, and confirm the lab received and logged it in. From there the sample becomes a data-quality and compliance task, where the difference between a paperwork program and a defensible one shows up.
Reading Results Against Your Permit Benchmarks
When results come back, compare each analytical parameter to the benchmark your permit actually sets. Some permits list numeric effluent limits, some use benchmark values that trigger a response rather than an automatic violation, and some require reporting regardless of exceedance. Know which type applies to each parameter before you react.
Build a simple results log that captures, for each event and outfall:
- Parameter, result, units, and the lab’s reporting limit
- The applicable permit limit or benchmark and the comparison
- Whether the result is a detection, a non-detect, or an estimated value
That log is what you hand over when someone asks how the facility performed across the year.
Quality Assurance: Making the Result Defensible
A single number with no quality context is easy to challenge. Quality assurance and quality control answers the challenge before it is made. Depending on your permit and lab, that can include:
- Field blanks to show your containers and handling did not introduce contamination
- Field duplicates to show your collection method is repeatable
- Equipment rinsate blanks when you use reusable sampling gear
If a QC result falls outside your acceptance criteria, document what happened and what you did about it. A failed duplicate with a written explanation beats a clean-looking dataset with no QC at all.
Investigating an Exceedance
If a result exceeds a limit or benchmark, don’t panic and don’t hide it. Work the problem in order:
- Re-check the field notes for anything that could explain the result, a spill, construction activity, a first-flush event, a sampling error, or a meter that was out of calibration.
- Review the QC results for that event. A failed blank or duplicate changes how much weight the number deserves.
- Walk the drainage area that feeds the outfall and look for likely sources: exposed material, leaking equipment, disturbed soil, illicit connections, or a change in operations since the last event.
- Consider verification sampling if your permit allows it and the result looks like an outlier. Resample at the same point with the same method so the comparison is fair.
- Document your response and any corrective action you take, with dates and who did what.
- Report as your permit requires, within the deadline it sets, and keep a copy of everything you submitted.
An exceedance is a signal, not a verdict. The follow-up, QC review, source investigation, corrective action, and resampling where required, is where good programs separate from paperwork programs. Document it as if a regulator will read it, because eventually one will.
Closing the Loop Back to the SWPPP
If an exceedance traces to a real source, the fix usually belongs in your Stormwater Pollution Prevention Plan and your best management practices, a new cover, a berm, a housekeeping change, or a revised inspection schedule. Update the SWPPP, note the change, and watch the next event to confirm improvement. Sampling that never feeds back into the plan is just data collection.
Frequently Asked Questions
How do you collect an industrial stormwater sample without contaminating it?
Wear clean, disposable gloves and never touch the inside of the sample container or cap. Collect the grab sample directly into the bottle from the discharge, or use a clean sampling pole and dipper that have been decontaminated between locations. Keep the bottle closed until the moment of collection, fill it without overfilling if preservatives are present, and place it on ice immediately. Avoid sampling from puddles, standing water, or areas where oil, debris, or sediment have accumulated, because those do not represent the stormwater discharge you are required to monitor.
What equipment is needed for stormwater sampling?
Basic stormwater sampling equipment includes clean sample containers supplied by the laboratory, a cooler with ice, disposable gloves, a sampling pole or dipper for hard-to-reach outfalls, a field meter for pH and temperature if required, a camera or phone for photos, and a field notebook or sampling forms. Bring the current permit, the SWPPP, and the sampling checklist. Inspect and calibrate meters before the storm, and confirm the lab has provided the correct containers and preservatives for each analytical parameter listed in your permit.
What happens if there is no qualifying storm event to sample?
If no qualifying storm event occurs during the reporting year, document your monitoring efforts: weather logs, forecast checks, and site observations showing no discharge occurred. Some permits allow you to collect a sample from the first storm event of the following year or to submit a written explanation. Check your specific stormwater permit requirements, because the rule varies by state and by permit. Never fabricate a sample or collect from a non-qualifying event, and keep the documentation ready for inspection.
How should stormwater samples be labeled and preserved?
Label each container with the facility name, outfall or sampling location, date and time of collection, sample type, and the analytical parameters requested. Complete the chain of custody form before you leave the site. Preservation depends on the parameter: many require cooling to 4 degrees Celsius on ice, while some require chemical preservation supplied by the lab. Keep samples dark and cold, deliver them to the laboratory within the holding time, and record the temperature and condition of the cooler on the chain of custody.
Stormwater sampling fails for boring reasons: a missed forecast, a warm cooler, a blank field log. Michael Karl McNeil built a practice around preventing exactly those failures, with stormwater program support, SWPPP development as a Qualified SWPPP Developer, and industrial hygiene and environmental assessment work across California and the Western states. If your sampling season keeps producing gaps you can’t explain, get in touch and we’ll help you close them.


Leave a Reply