Table of Contents
- What You’ll Need Before You Start Noise Dosimetry
- Step 1: Define the Noise Dosimetry Sampling Plan
- Step 2: Follow Noise Dosimeter Calibration Procedures
- Step 3: Run a Preliminary Walkaround Sound Survey
- Step 4: Place the Dosimeter Microphone Correctly
- Step 5: Set Noise Dosimetry Sampling Duration
- Step 6: Analyze Data and Interpret Noise Dose
- Step 7: Meet OSHA 1910.95 Noise Monitoring Requirements
- Frequently Asked Questions
Last Updated: September 26, 2026
What You’ll Need Before You Start Noise Dosimetry
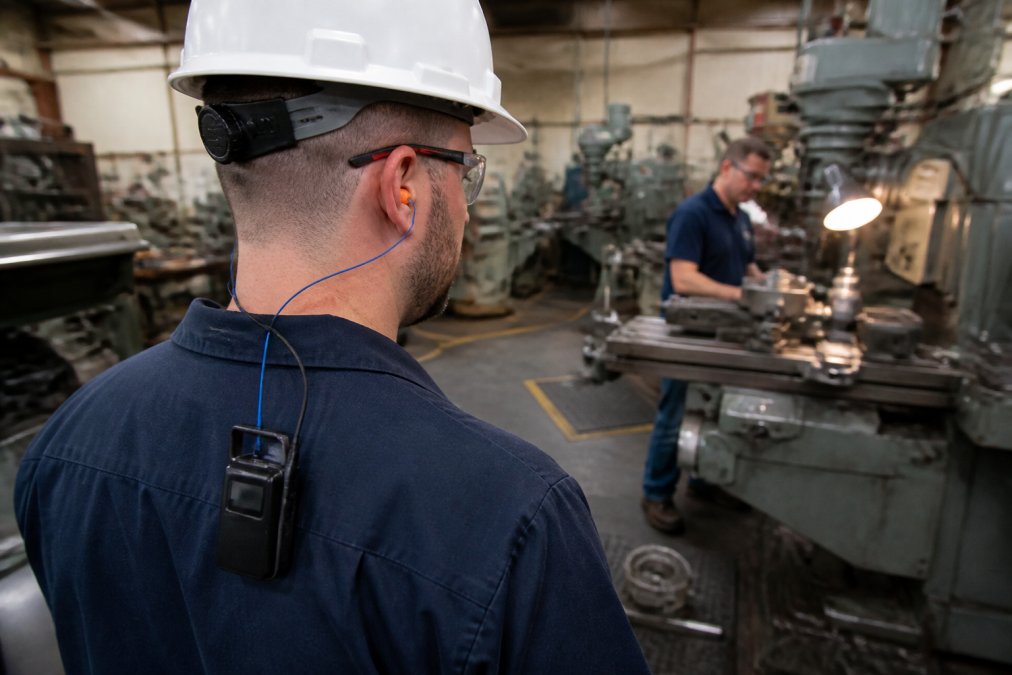
Noise dosimetry measures a single worker’s total noise exposure over a full shift using a body-worn meter. It tells you what a sound level meter cannot: how much noise one person actually absorbs across a real workday.
What you’ll need:
- A calibrated noise dosimeter with a logging function
- An acoustic calibrator matched to the dosimeter
- A sound level meter for the walkaround survey
- A written sampling plan and worker notification letters
- Calibration records, field notes, and a data download cable
Buy or rent a dosimeter that logs time history, not just a single dose number. When OSHA asks how you reached your result, a time-history file answers the question. A single number does not.
Step 1: Define the Noise Dosimetry Sampling Plan
A noise dosimetry sampling plan is a written document that states who you will monitor, for how long, and why. Build it before anyone clips on a meter.
Step 2: Follow Noise Dosimeter Calibration Procedures
Noise dosimeter calibration procedures have two parts: a pre-monitoring check and a post-monitoring check. Skip either one and your data is open to challenge.
Pre-Monitoring Calibration With an Acoustic Calibrator
An acoustic calibrator is a small device that emits a known tone, usually at 94 dB and 1000 Hz, so you can confirm the dosimeter reads correctly.
A common field error is calibrating with the microphone still fitted with its windscreen. The tone reads low, the dosimeter gets adjusted to compensate, and every measurement that day is wrong. Remove the windscreen first.
Step 3: Run a Preliminary Walkaround Sound Survey
A walkaround survey is a quick pass through the work area with a sound level meter to find where the loud noise actually is. It decides where the expensive dosimeter hours go.
Set the Sound Level Meter Before You Walk
A survey done with the wrong meter settings produces a map you cannot trust. Before you step onto the floor:
- Weighting: A-weighted (dBA) for everything, because dBA approximates how the human ear responds. C-weighted readings are useful only as a secondary check on low-frequency sources like large compressors and diesel equipment.
- Response: slow response for steady machinery, fast response when you are chasing impact noise from presses, nail guns, or drop-forge equipment.
- Range: set the meter to a range that keeps the reading mid-scale. A meter pinned at the top of its range is clipping, and the number on screen is meaningless.
- Calibration: verify the meter with an acoustic calibrator at the start of the survey, exactly as you would a dosimeter.
How to Read the Floor
Stand still at each station for 15 to 30 seconds and let the number settle. A reading that swings 15 dB usually means impact noise or a cycling machine, and that station needs a dosimeter even if the average looks low.
What to record at each stop:
- Location and the equipment running at that moment
- The dBA reading and whether it was steady or fluctuating
- How long the worker actually spends there per shift
- Whether the worker was wearing hearing protection already
Catch the Noise Nobody Notices
A sound survey also catches background noise you might otherwise miss: ventilation, compressors, nearby traffic, and equipment that only runs part of the shift. Two patterns trip people up constantly:
- Intermittent equipment. A chop saw that runs 20 minutes a shift can dominate a worker’s dose even though the floor looks quiet most of the day. Ask the crew what runs and when.
- Non-production noise. Overhead doors, forklift reverse alarms, and HVAC intakes are easy to ignore because they are always there. They still count toward the dose.
Turn the Survey Into a Sampling Map
Keep a simple map noting the location, equipment, and level. Sketch the floor plan, mark each hot spot with its dBA reading, then circle the job groups that work inside those hot spots. Those circled groups become your representative sampling list. When an inspector asks why you monitored the press operator and not the packer, the map answers in five seconds.
Photograph the sound level meter display at each hot spot with the location visible in the frame. It takes two seconds, and it gives you a timestamped record that the survey actually happened the way your notes say it did.
Step 4: Place the Dosimeter Microphone Correctly
Microphone placement decides whether your data is valid. The dosimeter microphone must sit in the hearing zone, the area around the ear where sound actually reaches the worker.

Placement rules that hold up:
- Keep the mic on the shoulder, not on the belt or in a pocket
- Route the cable so it will not snag on equipment
- Point the mic outward, away from the body
- Check the fit at the start and midway through the shift
Step 5: Set Noise Dosimetry Sampling Duration
Noise dosimetry sampling duration should cover the full shift whenever possible. A full-shift sample captures the quiet stretches and the loud bursts together.
Set the dosimeter before the shift starts:
- Exchange rate: 5 dB for OSHA, 3 dB for NIOSH
- Threshold level: 80 dBA for OSHA, 75 dBA for NIOSH
- Criterion level: 90 dBA for OSHA
- Response: slow
Step 6: Analyze Data and Interpret Noise Dose
Download the dosimeter data and read the dose against the standard you set. A dose of 100% means the worker hit the full allowable exposure for the shift.
Time-Weighted Average, Exchange Rate, and Threshold Level
The time-weighted average is the average noise level a worker absorbs over the shift, adjusted for how long they were exposed. It is the number OSHA compares to the permissible exposure limit.
| Term | What It Means | OSHA Value | NIOSH Value |
|---|---|---|---|
| Exchange rate | Level rise that halves allowed time | 5 dB | 3 dB |
| Threshold level | Level where counting starts | 80 dBA | 75 dBA |
| Criterion level | Level for a 100% dose | 90 dBA | 85 dBA |
| Action level | When a program must start | 85 dBA | 85 dBA |
A worker can pass OSHA at 90 dBA TWA and still sit above the NIOSH recommended limit. If you only check one number, you are managing to the minimum.
Step 7: Meet OSHA 1910.95 Noise Monitoring Requirements
OSHA 1910.95 noise monitoring requirements set the rules for when and how you measure. Monitoring is required when workers may be exposed at or above an 85 dBA time-weighted average.
- Monitor whenever exposure may reach the action level
- Repeat monitoring when production or equipment changes
- Notify each worker of their own result
- Give affected workers a chance to observe the monitoring
- Provide free annual audiograms for workers at or above the action level
Troubleshooting the Field Errors That Ruin Good Data
Most guides assume the shift goes perfectly. It rarely does. These failures show up in the field, and each looks like this in your data:
- Dosimeter left on a bench. The time-history file shows a flat, low line with no variation. Real workers produce a jagged trace as they move between tasks. A suspiciously smooth file is the tell.
- Wrong exchange rate. A dosimeter set to 3 dB when you are reporting against OSHA’s 5 dB exchange rate will overstate the dose on fluctuating noise. Check the setting on the display before the shift, not after.
- Missing post-shift calibration. Without it, the data is open to challenge and you have no way to prove the instrument held its accuracy.
- Microphone covered by clothing or a hood. The trace drops sharply partway through the shift and stays low. That is fabric, not a quiet worker.
- Sampling only the quiet part of the shift. The dose comes back comfortably low, but the worker’s actual loud task was never captured. This is the most dangerous error because the report looks clean.
- Wind and airflow across the mic. Outdoor work, loading docks, and anywhere near a fan or compressed-air blowoff can push the reading up. A windscreen helps, but it must come off before calibration.
- Cable snags and connector damage. Intermittent dropouts in the time-history file usually trace back to a strained cable, not a software problem.
Turn Raw Data Into a Report People Can Act On
Software integration is where most programs quietly fall apart. Modern dosimeters export time-history files, usually as CSV, and that raw file is not a report, it is a spreadsheet.
Three things a useful report should show:
- The dose and TWA for each monitored worker, against both the OSHA and NIOSH values
- The time-history chart, annotated with the tasks the worker performed
- The calibration record, pre- and post-shift, with the calibrator serial number
The Human Side Nobody Writes About
Employee communication and consent matter more than most guides admit. Workers have a right to see their results and know what the numbers mean, and a worker who understands the process is far less likely to quietly move the microphone.
A defensible monitoring program has three legs: valid data, a clear report, and workers who trust the process. Miss any one and the other two get challenged.
Frequently Asked Questions
What are the OSHA noise dosimeter requirements?
OSHA requires noise monitoring under 29 CFR 1910.95 whenever workers may be exposed at or above an 85 dBA time-weighted average over 8 hours, known as the action level. A noise dosimeter measures personal noise exposure across a full shift, capturing both continuous and intermittent noise. If exposure reaches the action level, you must notify affected employees, offer audiometric testing, and provide hearing protection to those who request it.
How long should a noise dosimetry sample last?
Sampling duration should cover a full work shift whenever possible, especially for workers with variable tasks. If a full-shift sample is not practical, sample the loudest and most representative tasks long enough to calculate a reliable time-weighted average. Short samples risk missing peak sound pressure events. Document why you chose a particular duration so your results hold up during an OSHA inspection.
What is the difference between a sound level meter and a noise dosimeter?
A sound level meter measures noise at a single point in time and is best for walkaround surveys and noise mapping. A noise dosimeter is worn by the worker and logs personal noise exposure continuously, producing a time-weighted average and noise dose over the shift. Most compliance decisions about personal noise exposure rely on dosimetry data, while sound level meters help you decide where dosimetry is needed.
How do you calibrate a noise dosimeter before use?
Attach an acoustic calibrator to the dosimeter microphone and verify the reading against the calibrator’s stated output, typically 94 dB or 114 dB at 1000 Hz. Record the pre-calibration result, then repeat the check after monitoring ends. Most OSHA-compliant programs require calibration within 24 hours before and after each sample. If post-calibration drifts more than 1 dB, discard the data and resample.


Leave a Reply